Braces-friendly recipe

Back to School with Braces

September 16th, 2021

With the start of a new school year, parents and kids everywhere are heading out to stock up on back-to-school supplies. If you're undergoing orthodontic treatment, we'd suggest adding a few extra supplies to your backpack. Here's a list of items that will help make your school year braces-friendly and worry free:

Orthodontic wax - Sometimes braces can be irritating to the mouth. If you have a poking wire or a loose bracket, a small amount of non-medicinal relief wax makes an excellent buffer for your gums. It will keep you in school and out of discomfort until you can visit our office for repair.

Elastics (rubber bands) - If Dr. Godwin has prescribed elastics, they must be worn as instructed. Often, they are worn 24/7, except while eating and brushing your teeth. During the school day, you should remove the elastics for lunch, but don't forget to replace them with fresh, clean elastics when you are through. Packing an extra bag of elastics will ensure that you have them available at all times.

Travel toothbrush and Floss - Keeping your teeth and braces clean throughout orthodontic treatment is a priority. Besides that, your friends and teachers don't want to look at food stuck to your braces - Yuk!  Keep your teeth and Dr. Godwin happy . . . Remember to brush after every meal.

Floss Threaders and Interproximal Brushes -  Orthodontic appliances can often make flossing and brushing more challenging. Products like floss threaders and proxy brushes can help take the hassle out of cleaning around brackets and wires. Proxy brushes are great for removing trapped food particles that can get lodged in and around orthodontic appliances. Floss threaders and products like Oral-B Superfloss are made with special, rigid ends that make flossing with braces much easier and more effective.

Retainer case - If you are wearing removable orthodontic appliances, you'll need to take them out before eating lunch. When retainers or other removable appliances are not in your mouth, they should ALWAYS be in a retainer case. Most retainers are lost in school cafeterias or restaurants, so keep yours safe . . . Take your retainer case to school!

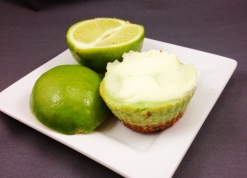
Braces-friendly snacks and/or lunches - Pack non-stick snacks and lunches that are easy to chew and won't damage your orthodontic appliances. Don't forget to stay away from sugary drinks and treats that can lead to cavities. There are lots of braces-friendly alternatives. For more ideas, visit bracescookbook.com

If you have any questions, or need any of the above items for your backpack, feel free to contact the team at Bel Air Orthodontics. We hope you have a fun and successful school year!

Braces Cookbook 2 - Comfort Food With A Gourmet Touch

May 24th, 2017

While teens with braces may worry about whether their colored rubber bands go with today’s outfit, adults in orthodontic treatment have different concerns, like gracefully making it through business meetings and dinner parties. These issues are becoming more common, as approximately 1 in 5 people in orthodontic treatment are adults, according to the American Association of Orthodontists.

Author Pam Waterman, who spent five years in braces as a teen and one as an adult, recognized how tricky it can be to navigate adulthood with braces. So she teamed up with Chef Amee Hoge to create The Braces Cookbook 2: Comfort Food with a Gourmet Touch.

The result is a creative collection of 50 recipes appropriate for those in braces, including entrees as well as breakfasts, appetizers, desserts and vegetarian dishes. For those looking to expand their cooking skills or impress dinner guests, many of the recipes feature optional gourmet additions courtesy of Chef Hoge, a graduate of the French Culinary Institute in New York City.

The Braces Cookbook 2
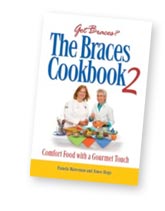
A robust resource, Cookbook 2 supplements its recipes with survival advice for adults in braces. The authors offer coping techniques for adults in the business world, tips for difficult days, and practical suggestions for dining out and grocery shopping.

Cookbook 2 follows Waterman’s popular The Braces Cookbook: Recipes You (and Your Orthodontist) Will Love, which she co-wrote with her then 12-year-old daughter, Brenda and was directed at children and teens in braces.

Check out these sample recipes; one savory and one sweet:

Crabmeat Appetizers

When you've adjusted to your braces to the point of eating bread (!!), try these quick-to-assemble treats. A few minutes under the broiler, and they're ready to serve. You can also put them together a few hours ahead of time; just cover the baking sheet with plastic wrap and store it in the fridge for a few hours until you're ready to broil them.

2 cans (about 5oz each) flaked crabmeat
1 loaf dark rye party bread (I find it in front of the deli counter. Each slice is about 2" square, and 1/4-inch thick, and there are probably 40 slices in a loaf; one loaf would make a double batch)
1 large cucumber
1 package(8 oz.) sliced Swiss cheese
Mayonnaise or Miracle Whip (to taste - about 2 Tablespoons)

On a large cookie sheet, lay out 20 slices of the party rye. Peel and slice the cucumbe into 1/4-inch slicesr; lay one slice on each slice of bread. Drain the crabmeat, and mix it with mayo or Miracle Whip to your liking (I go easy on the mayo myself). Put about a tablespoon of the crabmeat mixture on each cucumber. Fold and tear each slice of Swiss cheese into 8 pieces. Lay one slice on each appetizer. Broil until cheese is lightly golden.

Butterscotch Brownies

My mother started making these "non-chocolate" brownies when I was a little girl. Since she in turn has lived with our family since our oldest daughter was one, our girls have renamed them "Grandma's Tannies." By any name, they're fabulous, and oh so soft.

1/3 cup vegetable oil
2 cups brown sugar
2 eggs
1 ½ cups flour
2 tsp baking powder
1 tsp salt
1 tsp vanilla
(optional: 1 cup butterscotch bits)

Preheat oven to 350 degrees. Baking time 40 minutes.

In a large bowl, combine oil and brown sugar, using an electric mixer and blending well. Add eggs. Stir in flour, baking powder and salt, then add vanilla. Spread batter into a greased 9"x9" pan. If desired, sprinkle 1 cup butterscotch bits over top. Bake 40 minutes at 350 degrees. After cooling one minute, swirl the bits with a knife to give a marbleized effect. Cover pan with foil keep to brownies soft, or cut them in squares and store them in a covered container.

By adapting many of your family favorites into braces-friendly recipes, boring applesauce and mashed potatoes at every meal is a thing of the past. The recipes in this book will quickly become family favorites. Both The Braces Cookbook 2 and the original Braces Cookbook are available at Amazon.com and Barnes and Noble. Enjoy!

Dig In . . . It's National Cheesecake Day

July 30th, 2015

While it's an unofficial holiday, most people would agree that National Cheesecake Day is worth celebrating. After all, who doesn't love cheesecake. Baked, unbaked, flavored, topped or drizzled, there are plenty of cheesecake recipes that are delicious and braces-friendly. Whether you make yours from scratch or you pick one up at your favorite bakery or restaurant, eat and enjoy without guilt. After all, National Cheesecake Day only comes once a year!

We're helping you kick off your celebration with this recipe, courtesy of The Braces Cookbook, by Pamela Waterman.

Lime-Graham Cheesecake Nibbles

Kick start your taste buds with these tangy lime cheesecakes layered into cupcake papers. The easy crust combines graham cracker crumbs with melted margarine, and the fluffy filling gets its zip from real lime juice. For an even "spicier" version, substitute finely crushed gingersnaps for the grahams.

Crust:

  • 1 1/2 cups graham cracker crumbs (about 9 double-square crackers, crushed)
  • 2 Tablespoons margarine, melted

Or

  • 1 1/2 cups gingersnap crumbs (about 24-30 gingersnap cookies, crushed)
  • 3 Tablespoons margarine, melted

Filling:

  • 2 eggs, separated
  • 1/8 teaspoon salt
  • 1 (8 oz.) packages cream cheese, softened
  • 3/4 cup sugar
  • 3 drops green food coloring (optional)
  • 2 Tablespoons lime juice
  • 1 Tablespoon all-purpose flour

Preheat oven to 325 degrees. Bake for 25 minutes.

Line two muffin tins with 24 cupcake papers. In a medium bowl, stir together the crumbs and margarine. Spoon 1 Tablespoon of the crumb mixture into each paper. Press down the mixture firmly with the bottom of a small juice glass.

In a medium bowl, using an electric mixer, beat together the egg whites and the salt until the mixture forms soft peaks. Set aside. In a large bowl, use the mixer to beat together the cream cheese, sugar, food coloring, lime juice and flour until fluffy. Add the egg yolks until well mixed; then use a spoon to gently fold in the beaten egg whites.

Spoon a heaping tablespoon of the filling into each paper. Bake at 325 degrees for 25 minutes. Cool on the counter for 20 minutes, then keep refrigerated. Makes two dozen.

Optional: Once cooled, top your cupcakes with whipped cream and decorate with green sprinkles or coconut.